What's the Best Way to Set Up a Failsafe on an RC Transmitter?

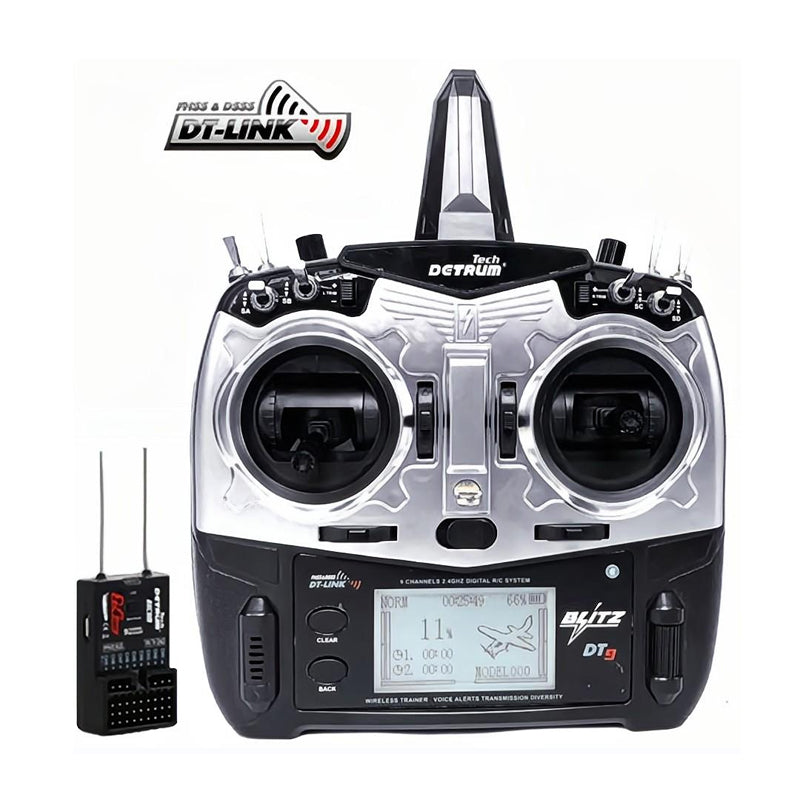
When flying RC airplanes, having a failsafe mechanism is essential for safety and peace of mind. A failsafe ensures that your aircraft follows predefined actions in case of signal loss or other transmitter-related issues. Over my years of flying RC planes, I’ve learned the importance of a well-configured failsafe, particularly when using advanced transmitters like the Detrum Blitz-DT9 9CH Smart Programming/Telemetry RC Transmitter Set. In this article, I’ll guide you through the process of setting up a failsafe, share my personal experiences, and provide practical tips to ensure a seamless flying experience.
What is a Failsafe and Why is It Important?
A failsafe is a feature in RC systems that dictates what the receiver will do if the transmitter signal is lost. Without it, your aircraft could spiral out of control, posing risks to property, people, and the plane itself.
Failsafes can be configured to:
-
Cut off the throttle.
-
Maintain control surfaces in a neutral position.
-
Trigger specific actions, like deploying flaps for a controlled descent.
With my Detrum Blitz-DT9 transmitter, I’ve experienced how a properly set failsafe can turn a potential disaster into a manageable situation.
How to Set Up a Failsafe on the Detrum Blitz-DT9
Step 1: Understand Your Equipment
Before setting up the failsafe, familiarize yourself with the transmitter’s and receiver’s capabilities. The Detrum Blitz-DT9 features smart programming and telemetry, which make configuring failsafes straightforward. Its SR86A-G receiver supports a robust failsafe mechanism, ensuring reliable performance even in complex environments.
Step 2: Connect and Bind the Transmitter to the Receiver
-
Power on the receiver and transmitter.
-
Enter binding mode on the Blitz-DT9.
-
Ensure the receiver’s LED indicates a successful bind.
Binding establishes the communication channel, allowing failsafe settings to be programmed.
Step 3: Configure Failsafe Settings
-
Access the Failsafe Menu: On the Blitz-DT9, navigate to the failsafe configuration menu under system settings.
-
Set Throttle Position: For safety, configure the throttle to cut off in case of signal loss.
-
Adjust Control Surfaces: Set the ailerons, elevator, and rudder to neutral or slightly deflected for a gentle glide.
-
Save Settings: Confirm and save your failsafe settings before exiting the menu.
Step 4: Test the Failsafe
-
Power on the plane and transmitter.
-
Simulate signal loss by turning off the transmitter.
-
Observe the plane’s behavior to ensure it follows the failsafe actions.
Testing is crucial to verify that the failsafe will work as intended in real scenarios.
Tips for Effective Failsafe Configuration
-
Start with a Checklist: Before every flight, review your failsafe settings to ensure they are active and appropriate for the flight conditions.
-
Update Firmware: Keep your transmitter and receiver firmware up to date for optimal failsafe performance.
-
Customize for the Aircraft: Different planes require unique failsafe configurations. For instance, a warbird like the Dynam F4U Corsair may need a glide descent, while a jet might benefit from a straight throttle cut.
My Experience with the Detrum Blitz-DT9 Failsafe
Using the Blitz-DT9, I’ve faced situations where the failsafe proved invaluable. One memorable instance occurred during a windy day at the field. While flying my Dynam A-10 Thunderbolt II V2, the transmitter momentarily lost connection due to interference. Thanks to the configured failsafe, the plane entered a controlled glide instead of spiraling out of control. This gave me enough time to regain signal and safely land the jet.
The Blitz-DT9’s telemetry rc transmitter receiver feedback also alerted me to the issue instantly, showcasing its value for proactive monitoring.
Common Failsafe Mistakes to Avoid
-
Forgetting to Test: Always test the failsafe before every flight.
-
Improper Throttle Settings: Ensure the throttle is cut completely to avoid unintended movement.
-
Neglecting Environment-Specific Adjustments: Modify failsafe settings for different flying locations or weather conditions.
FAQs About RC Failsafes
1. Can I set up a failsafe on any transmitter?
Most modern transmitters, including the Detrum Blitz-DT9, support failsafe configurations. However, some basic models may have limited options.
2. What happens if the failsafe isn’t configured?
If a failsafe isn’t set, the receiver may hold the last command received, potentially leading to crashes or uncontrolled behavior.
3. Can I change the failsafe settings after binding?
Yes, failsafe settings can be updated anytime via the transmitter menu.
Failsafe Settings Table
| Control | Recommended Setting |
|---|---|
| Throttle | Cut off |
| Elevator | Neutral or slight up trim |
| Ailerons | Neutral |
| Rudder | Neutral or slight deflection |
| Flaps (if available) | Deploy for controlled descent |
Conclusion
Setting up a failsafe is a critical step in ensuring the safety and longevity of your RC aircraft. With the Detrum Blitz-DT9 9CH Smart Programming/Telemetry Transmitter, the process is intuitive and reliable. By taking the time to configure and test your failsafe, you’ll enjoy more confident and stress-free flights.
Whether you’re piloting a high-performance jet or a beginner-friendly trainer, always prioritize safety—it’s the hallmark of a responsible RC pilot. If you’ve had similar experiences or have additional tips, feel free to share them in the comments below!


